What are Recipes?
Imagine baking a cake, you could just throw the ingredients together and then put the combined items into the oven and hope for the best. If you are very skilled or lucky the result might turn out ok. The next time you try to make the same cake you may do it differently which may get the same result or give you an unattended result (good or bad). If you use a recipe you know the exact ingredients and it speeds up the process of baking the cake.
Just like recipes for baking, recipes for the Pro Mission Tool have the same result. They are bits of node code that contains the instructions to achieve a certain result, such as playing a cinematic camera, working out if the player has gone out of an area and giving them voice over or updating a particular variable for example. Recipes can be a simple single node or multiple node code.
The Pro Mission Tool has many different nodes and they can contain various property settings that can have a major impact on the missions you are creating. When you have so many options available to you it can be difficult to remember what you might have done before, so creating a recipe is a way to quickly access work you have done before and get your latest mission up and running quickly. Recipes are the building blocks to your mission creation.
How to Access Recipes?
There are two types of recipes available:
- Packaged Recipes: These are recipes that Dovetail Games mission team have created and are shipped with the Pro Mission Tool as default.
- User Created Recipes: These are recipes that you have created.
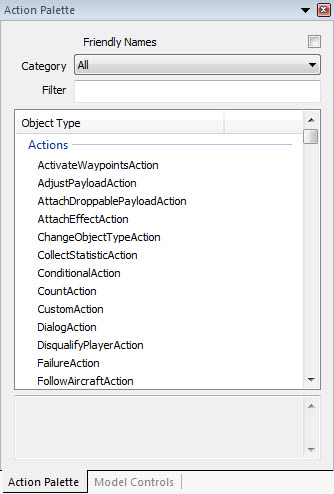
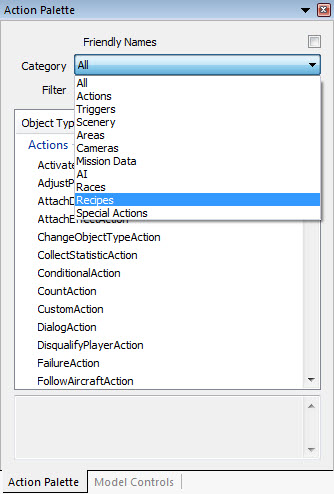
All recipes can be accessed through the Action Palette which is on the top right hand corner of the Pro Mission Tool. See Figure 1.26 and 1.27.
Figure 1.26. and 1.27. The Action Palette and the Category option.
Click on the Category drop down box as shown in Figure 1.27. and select the Recipes option, this will then display all packaged and user created recipes.
Packaged Recipes
Packaged recipes are recipes that have been created by Dovetail Games mission team and provide some commonly used recipes that we have used in the creation of some of our missions.
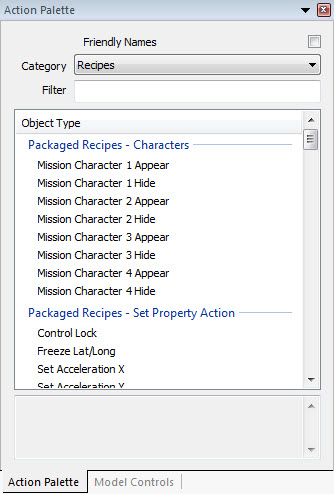
Figure 1.28. The Recipes list.
You'll notice in Figure 1.28. that the recipes are categorised so that they can be easily grouped together and found quickly. You can also use the search box to find a particular recipe. There are a number of categories for packaged recipes they can be defined as:
Characters: Handles the appearance of characters in the aircraft. Using these you can make up to four characters visible or invisible when required. If the aircraft has more than four seats you can edit the properties of any of the character recipe to handle this situation.
Set Property Action: Allows you to set the property of an object. There are a large number properties you can affect including the speed and velocity of the aircraft, if the player is able to use controls and its rudder and throttle positions.
Gauge Highlights: Allows you to highlight/flash particular gauges for a number of seconds. Very useful when giving the player information on which gauge to look at.
Part Highlights: A system similar to gauge highlights, but to allow the highlighting of various components in the aircraft.
General: This includes common mission items such as excluding traffic and creating a mission success goal.
Event Toggles: Allows you to switch on and off a setting.
Aircraft Lights: Allows you to switch on and off various aircraft lighting systems.
Audio: Contains a node to play music.
Property Test: Allows you to test a large variety of settings, this is extremely useful when you want to test what the player is doing before running the next bit of code.
Set Event ID: You can send a simulation event name (variable) to the game to set a particular item, such as opening a door. Note not all items work on all aircraft or in all situations.
Included Recipes
 | Note: Not all recipes will work for all aircraft. For example "Set Smoke ON" will not work for aircraft that are not equipped with a smoke system. |
Adding Recipes to Your Mission
Currently its not possible to drag and drop recipes from the Action Palette direct to the Event Editor window. You have two options for adding recipes:
Double click on the recipe which will add it to the bottom of the Event Editor window.
Double click on the node which you wish to add the recipe to then drag and drop it to the appropriate event node property.
Creating a Recipe
You can create a recipe of a node(s) you've already configured or create a new recipe from an already created recipe (perhaps you want a similar node and don't want to change all of the properties).
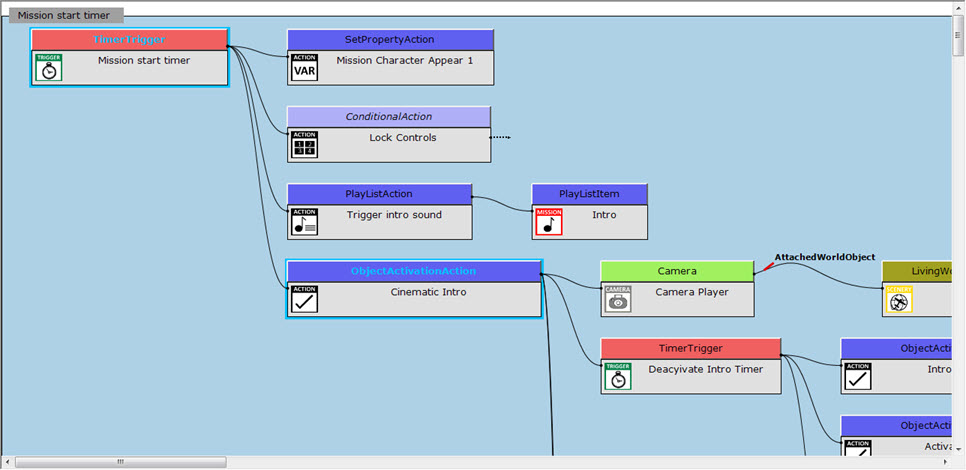
For this example we will assume you have created some code already. You can see in Figure 1.29 an example mission. In this example we are going to take two nodes and place them into a recipe, we'll take a PlayListAction object and a PlaylistItem node that is used to play music.
Figure 1.29. Some example code.
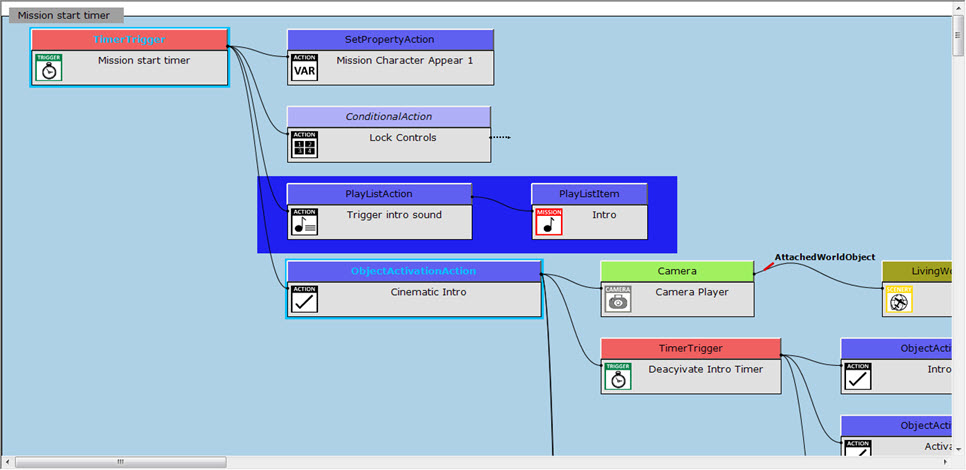
First we need to select the node(s) that we wish to be part of a recipe. Left click on an empty space around the nodes that you want to create a recipe from then drag the mouse to create a bounding box, drag this box over all required nodes. Release the left mouse button and you'll now see a blue box around the items as shown in Figure 1.30.
Figure 1.30. Selected items.
Then go in the text menu by selecting File | Save Selected as Recipe, this will bring up a dialogue box.
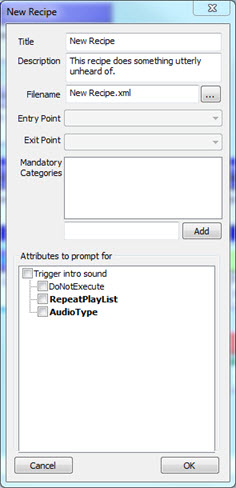
Figure 1.31. The New Recipe dialogue box.
Before the recipe has been created you will need to add a set of information.
Title: The title of the recipe as shown in the Action Palette.
Description: A description of what the recipe is meant to do.
Filename: This is the filename of the recipe, this needs to be unique.
Mandatory Categories: You can add the recipe to a category, enter the name and click on Add.
Attributes to Prompt for: If you want to edit particular properties when adding the recipe you can select them here.
Once you have filled in the details click on the OK button.