Change ListA list of changes made to this document.
Introduction The checklist is a feature designed to aid both new and advanced pilots in starting an aircraft from a cold and dark state. The checklist has two components, a 3D model within the plane which is used to open the checklist and then a 2D Scaleform popup which contains the content of the checklist. The checklist allows the user to work their way through the startup procedure for an aircraft without having to refer to tools or resources outside of the simulator causing a break in immersion. It also contains a variety of aids for novice pilots to locate and modify the various controls, buttons and levers in the aircraft. 3D Model All aircraft require a 3D Model of the checklist within the aircraft. The 3D model has three states controlled by two simvars as detailed below.
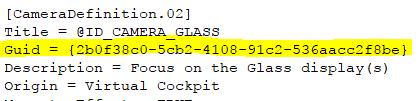
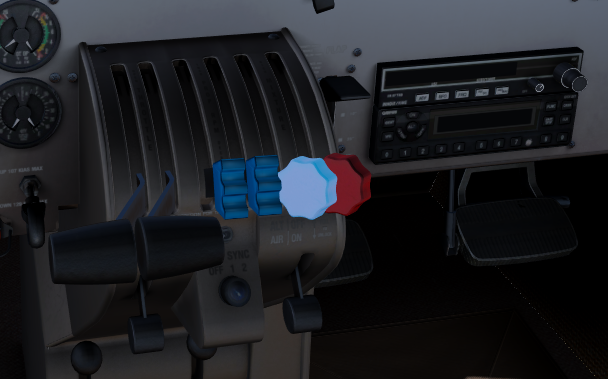
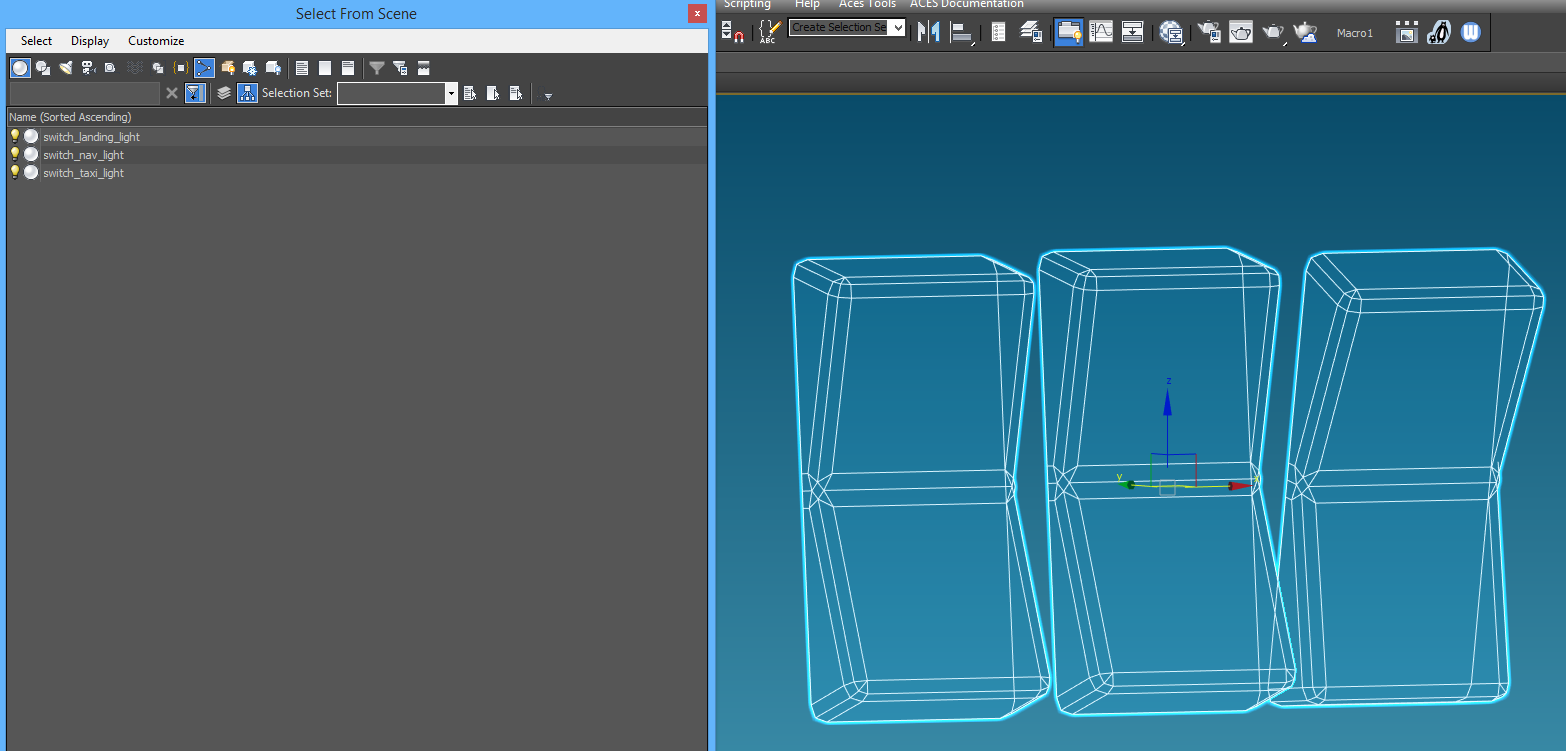
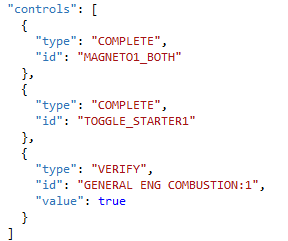
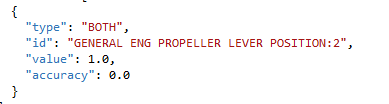
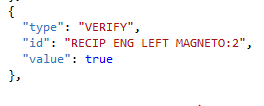
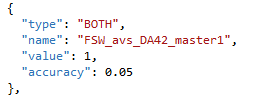
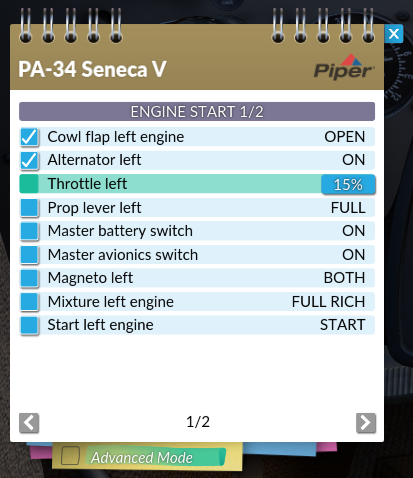
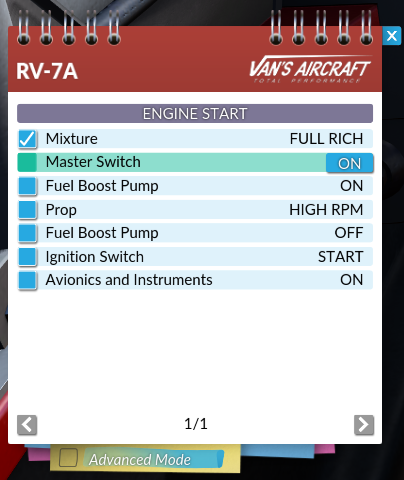
 2D Panel 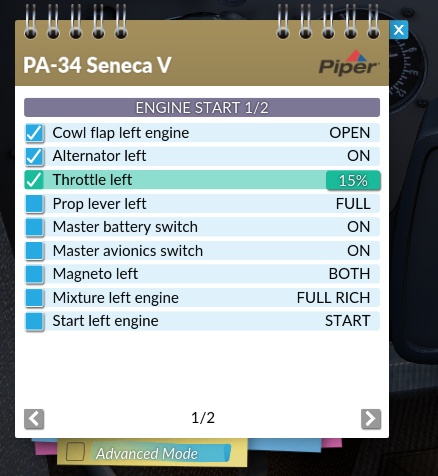 The 2D panel appears on the lower left of the screen when the 3D checklist model is clicked. It has a background design which is possible to customize per plane and its content is customized with JSON files. The button in the upper right of the checklist closes it and returns the 3D model of the checklist back to its secondary state (usually the map pocket). There's a list with all of the checklist steps specified in the JSON file which will get ticked off as the pilot completes those steps in the checklist. The checklist has two modes which are explained below: basic and advanced. There is no additional development required to support both modes in an aircraft, but they are worth being aware of. The button on the sticky notes is used to swap between basic and advanced modes. The two arrow buttons are used to change pages. Basic Mode Basic mode is designed for newer or inexperienced pilots and has additional aids aimed to gently introduce the concept of starting the aircraft and avoid confusion. When in basic mode you always have one checklist step selected and the camera is always locked to prevent moving the camera around and getting lost. When you select an item in the checklist the camera will move to a camera where that item is on screen and the item will begin to pulse with a light blue glow to aid with finding the control. You can then either interact with the control as normal or click the button on the right hand side of the step to automatically complete that step. While in basic mode the checklist must be followed in order, each step must be completed one after the other and you must click on the next step to advance to it. This is designed to streamline the experience for pilots learning the aircraft and newer simmers so that they have no chance of getting confused by steps being completed out of order or losing the control on the screen. Advanced Mode The advanced mode can be toggled using the sticky notes button on the bottom of the checklist. Advanced mode is designed to provide an experience more appropriate for an experienced simmer or pilot, where the checklist is used merely as a guide or reminder as it would be in a real aircraft. When in advanced mode the checklist shows the current state of the aircraft, so if there is for example a step for fuel pump on and one for fuel pump off only one of those will ever be ticked. The camera is unlocked and reset to the main cockpit camera when in advanced mode and the user is free to move or change cameras as they wish. If the pilot gets stuck on a checklist step or can't find a control then clicking that checklist step will apply the pulsing effect to the control for that step and the auto complete button becomes functional. Checklist steps can be completed in any order in advanced mode as it simply shows the current state of the aircraft, it's up to the pilot to determine if they have completed the checklist successfully. JSON Files The checklist gets its data and customization from JSON files stored in SimObjects/Airplanes/PlaneName/checklists. These JSON files specify what test is displayed to the user for each checklist step, which camera is used, which control is highlighted, which control is affected when auto complete is pressed and which variables are checked to determine if the step is complete. Currently one JSON file titled "Checklist.json" is supported. See SimObjects/Airplanes/Piper_PA34/checklists/Checklist.json for an example file. If you have not encountered JSON files before they are relatively simple to figure out from inspecting the files, however w3schools has a good, but mostly Javascript focused, JSON tutorial which may be of use here if there are any queries about syntax. Checklist Part Name  Pages  Each checklist can have a number of pages where each page can have a header/title and a number of checklist entries. A page can have a maximum of 12 checklist entries in it, but can have fewer if required. The pages are specified with an array and there can be as many pages as required, although usually two or three is enough for most GA aircraft.
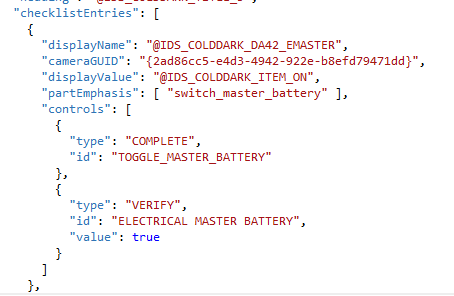
Checklist Entries
Order Dependent Type
Local Variable name where the name is the name of the local variable as used in the gauge code. This is case sensitive.
Visual Customization Customizing the visuals of the checklist can be achieved using the ChecklistBG.png image in Aircraft_Name/checklists. Any image placed here will be applied as the background image for the checklist for that aircraft. It is recommended that these images try to be consistent with those shipped with the default aircraft but with different text, colours or logos applied. However where applicable to the aircraft, for example with historic aircraft it may be preferred to change the style. These images should be 400x460 pixels however different sized images will be automatically scaled, with varying results depending on the aspect ratio of the image. Changing the shape of the checklist can be done using transparency in the ChecklistBG.png image. XToMDL In order to compile the aircraft .X file into .MDL binary format with a working checklist, XToMDL must know to include the checklist JSON files. This is done by adding the flag /PARTNAMES as an argument when invoking XToMDL via the command-line. This is usually unnecessary for aircraft exteriors and may actually cause in-game errors if the JSON files reference parts absent from such models. FAQ Why does my aircraft not start in cold and dark mode/with the checklist? When starting cold and dark the sim will now correctly set the status of items like magnetos and mixture to off, cut etc. This may cause issues if the aircraft is assuming these are on. Try checking that the magnetos are getting set to on when the starter is triggered (both within the aircraft and the checklist controls) for aircraft which don't have actual magneto switches you can switch, e.g the default DA40. Why do I get asserts about my local variable not existing? Local variables are created when they are first used by a gauge or model. You can get around this by referencing it when you initialize the aircraft or gauge so that it gets created then. Otherwise the checklist won't be able to use it until it has been referenced by a gauge or model. I have a checklist step which completes itself but in basic mode it's impossible to complete if the user doesn't click on the step quick enough as it will have already happened! If you set orderDependent to be false on that checklist step that should enable the step to be completed without clicking on the step in basic mode. How do you tell if the flight is cold and dark for the purposes of initializing avionics and local variables etc? For initializing parts of the aircraft correctly that are not managed by the engine (custom variables etc) it is recommended that you have an initialization sequence which runs just once when the aircraft is created, which will check the state of the engine (if it is combusting or not) and determine from that if things should be initialized for cold and dark or "normal" flight. An example of this would be the battery switch in the default PA18 which has three states managed by a custom variable while the engine only supports two. What are the @ symbols on text strings in the checklist? The @ symbols on text strings (usually @IDS_SOMETHING) specify that the string is a Flight Sim World translated string so will be replaced with a localized version of the string at run time in the language the sim is running in. This will be explained in more detail in its own page in future. |
Aircraft >